I've built a cider press, and Mike at Brewers Coop has kindly offered it a home so other brewers can use it too. We should be doing our last pressing next week, then I'll give it another coat of oil and drop it off to Brewers Coop. This is an account of the build process if anyone is interested, copied over from elsewhere - hope it formats ok.
The Problem
So, someone gave me about tonne of apples for "personal use". I really need to get better at saying no to free stuff. I left maybe 300kg behind (showing huge restraint right there) so only ended up with a meagre ~900kg of apples… And no equipment to deal with them.
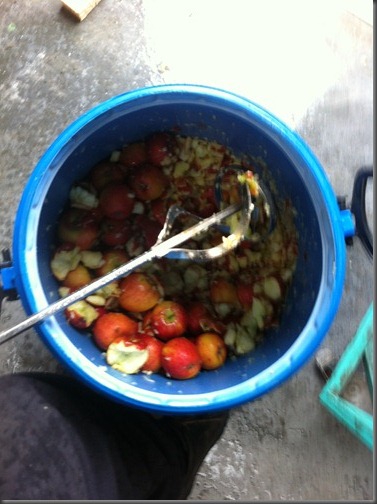
First of all, I blasted up the apples with a sharpened paint / mortar mixer on a grunty drill (highly effective, cheaper than dedicated equipment) and stuck the pulp in sacks in a couple of chest freezers to buy myself some sea room while I build a press. This lets me smash (“scratter”, I guess) apples in about 50-60kg batches, and at the same time I added pectinase to get me better extraction down the line.
The pulp went into plastic sacks and got frozen (took forever to freeze in the middle) and, having made an enormous, icy, apple flavoured problem for myself, I started to think about a press… We're not going to dwell on how hard it was to get the sacks back out of the freezer, that chapter is best forgotten.
Materials, Goals...
I don't really drink much cider so I wanted to do this on a shoestring budget. So, paying lots for materials was out. For the frame, I recycled some European pine bearers that had been shipped to NZ as packing material for some large machines (this is low grade core material, which is why you'll notice fairly extensive cracking in later photos).
Because this is such a low grade material, I don’t want to rely on it for strength, so I scrounged some scrap angle iron, steel flat bar, and threaded rod to reinforce the wood with. The wood still provides a nice aesthetic and good “spring” in the press, but the main loading is all on the steel. Bolts were scavenged from the same place as the wood.
For the basket and drain I selected NZ Macrocarpa that I can get in a rough sawn clear grade from a local mill, then do the ripping / dressing myself. I cut a corner on the basket construction and used aluminium flat bar for the hoops instead of stainless, because that’s what I had. Hopefully I don’t pay for that later! The drain tray is stainless sheet from a scrap dealer, with a bit of tig work done by a friend and a stub of stainless pipe sawn off an old keg stem. I had to actually buy stainless screws (Shock, horror) and some worktop oil for fixing and sealing the basket and drain. The basket is lined with muslin cloth during pressing, which cost 20 bucks for about 70m.
I wasn’t going to piss around making a mincy little press that take 5 – 20L of pulp per press cycle, so I settled on an 80L press capacity. I figure that it can be reasonably efficient with a 50L pulp load, which will be ideal for other homebrewers to use to get their 30L fermenter full, and also will be time effective for the odd crazy person like me who needs reasonable production out of it. It needed to be able to fit in my car once done with minimal deconstruction, be set up in a standard stud height garage, while the drain needed to be at least high enough for a 30l fermenter, and preferably high enough for my 75l fermenters too.
I apologise in advance for having made no plans whatsoever for others to follow, but I figure there are plans out there for those that need them. This is just my made up as I go along design.
Building
The basket
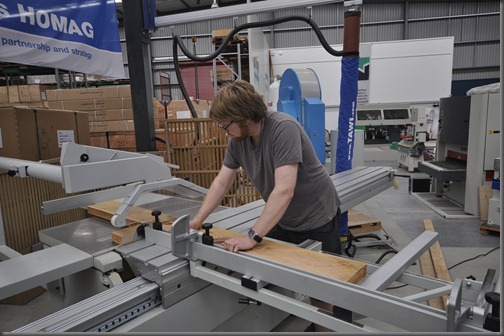
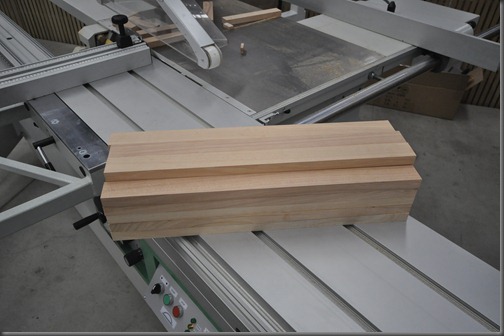
I decided to start with the basket. I used a panel saw and a 4-sider to make my staves out of rough sawn boards.
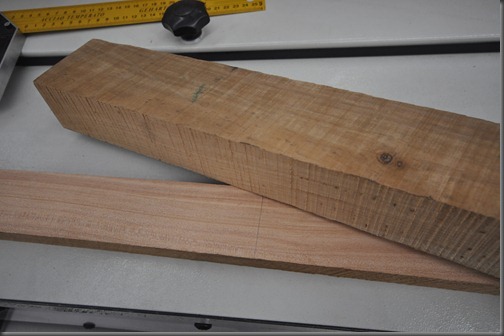
Quite nice grain in there under all the surface damage from the mill.
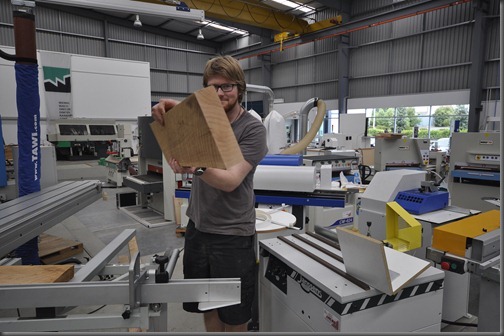
To the four sider:
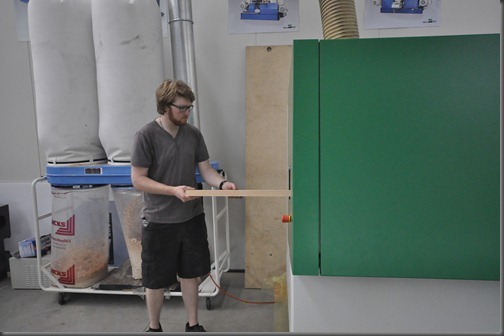
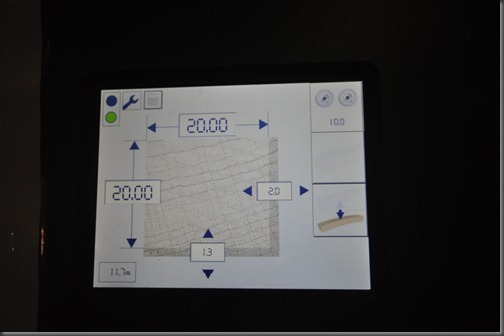
This thing is pretty sweet. It’s a little baby foursider for joinery shops and so on. It projects the spindle settings out onto the workpiece with lasers. Everything is better with lasers. And this is much less scary to use than a jointer + thicknesser.
I processed a bit extra while I was at this for making the drain. More on that later.
Right, so I’ve got all my staves, dressed and squared, so it’s time to oil them.
I did one coat an evening for a couple of days.
I drilled out a good spacing on my flat bars (soon to be hoops) with a drill press, aiming to have about 10mm between the staves at the inside of the basket after forming it into a cylinder. I taped the bars together for this so they’d all be dead on, no crooked staves.
With the hoops accurately drilled, I could start assembling the basket. The screws are stainless self tappers.
I left plenty of overlap, for weldng the bands after shaping, then set about to making it round. I found that ratchet load binders worked well for this, combined with a bit of brute force.
I dismantled the basket, then the hoops were TIG welded by BrewSci…
And given a brush finish (I tried way to hard to mechanise this before doing it the old fashioned way),
Then the whole thing was put back together again. Just like Humpty Dumpty only successful.
About this point I was cursing Pozidrive screws...

Basket done. It’s not a perfect cylinder but close enough. I reckon a few press cycles should sort that out anyway.
The Drain
The drain is what the basket sits on, and what channels the juice into the output vessel. Because I was building a reasonably large basket, I wasn’t happy with the idea of the press load sitting directly flat stainless pan – it would be hard for the juice to flow out.
Right?
Right.
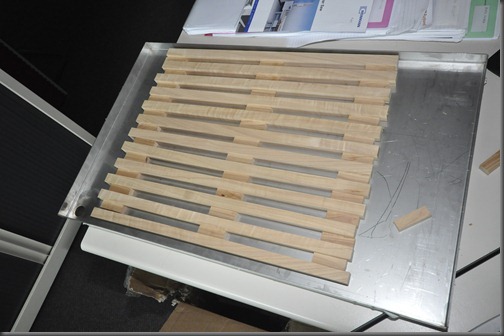
Having decided that this was a problem (with little-to-no research), I set about making a solution out of wood. I needed a slatted tray to press against, but juice needed to be free to flow out between the slats. This is the [potentially over complicated and fragile] answer I came up with.
I took some of the same material that I made the staves with, and thinned it down a touch with the foursider – no reason to take up more height than is absolutely necessary here, because it’ll just make the overall height taller and more awkward. Then I thinned down a few lengths even more, and went to the band saw and started cross cutting:
No, I'm not making a Jenga set...
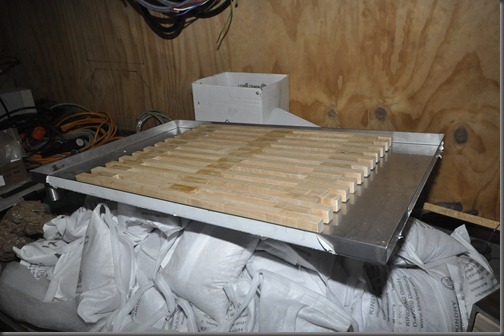
The idea mocked up, sitting upside down in the stainless drain pan (which has been tig welded by this point, again by the talented Mr Brewsci):
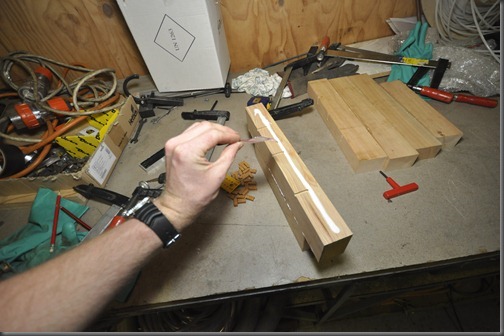
Then I got to gluing and clamping, which was a bit tedious. I have these neat clamps to use though which clamp across and down at the same time, that made it easier. By gluing it upside down I was able to get a roughly level top surface (bottom surface in the clamps). The slats will be in compression (i.e. completely supported) during operation, and the shear stress on each glue joint should (he says, with absolutely nothing to back it up other than the fact that I’ve done it now and it works) be low enough for the glue to hold the spacers in place. I used a structural grade PVA, it’s MSDS checked out alright for this application, but do check out glues before using them in potential contact with food / drink. These are "frontline" clamps if you're wondering.
Much nicer than sash clamps, But I did need to use some wood as spacers as they're designed for thicker workpieces than this.
I left the work clamped overnight, and in the morning…
Bit of glue to clean up...
This shows how the juice will run underneath the spacers:
It worked! A bit of orbital sanding on the top to sort out the glue squeeze out, and the same oil as the basket, and it was good to go.
Press Board
I found an old 8 ton hydraulic jack to use for the press power. But you still need a press board to act like a piston head. I decided that I would rip up some more macrocarpa, joint it with a Hoffman jointer (dovetail keys) and then cross laminate it so I still get good strength out at the edges.
So, back to the panel saw to cut the main boards, and measure out my hoffman joint locations…
… And then over to the hoffman jointer…
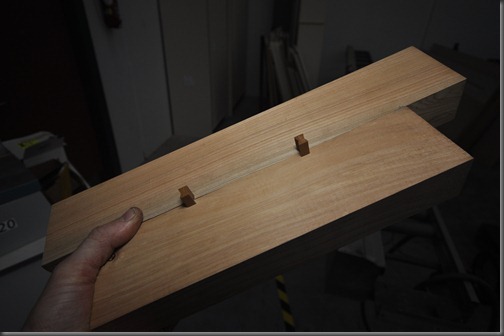
This is how they work- It's a bit tricky to get these totally lined up when the machine is missing a stop unfortunately:
Having routed all the joints I started gluing and jointing:
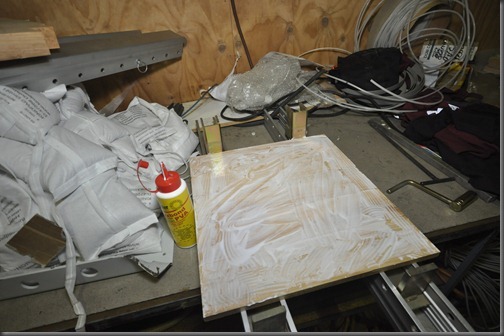
I try to get a good spread before clamping
And then the whole lot was clamped up overnight. Totally should have used the other clamps for this...
With got the main boards jointed and glued, it was time to cross laminate a layer across it. In an ideal world I’d laminate a layer above and a layer below, to balance the compression and tension in the grain across opposite sides, but I ran out of wood…
I ran the timber through a thicknesser to get it even, and also ran the previous lamination through at the same time:
Then got out the cool clamps again, glued and clamped the layers together. Because the new, unlaminated layer is wider than the other layer, I can do both with grain and cross grain lamination at the same time.
Gluing the butt joint first:
Then glueing the cross lamination,
Again with the spreading...
The previous lamination goes on, cross grain. I've placed it with the hoffman keys in the center to keep them out of sight.
These really are a better way to clamp.
After the work had been clamped overnight, I chucked it on a CNC router and set fire to the machine by using the wrong cutter milled out the cross laminated board into a circle, sized to have about 5mm clearance inside the basket.
Pay no attention to the smouldering mess on the floor.
With a bit of sanding and a coat or 3 of worktop oil to seal, the press plate was done, although I do find it hard to resist putting it in my kitchen and using it as a chopping board.
The Press Frame
So, with all the hard stuff done, I just needed to build a frame to hold it all together! I have to apologise about the standard of photos for this section, my DSLR was elsewhere for this section. Good thing it’s the more boring part.
I cut all my pine beams down on the panel saw. They are so hopeless twisted from drying too fast that I didn’t even bother trying to straighten them on the foursider – I would have lost too much wood.
I misused the panel saw to save me some work with the bandsaw (I would have had to assemble one) – bit naughty, don’t try this at home, etc. I was wanting to make a couple of half-lap joints for the drain bearers and a kind of bastardised tenon for the feet. I just made a whole load of paralel cuts and cleaned it up with a sugar. You really shouldn't use a normal saw as a hogger like this, so no pictures or my father will disown me.
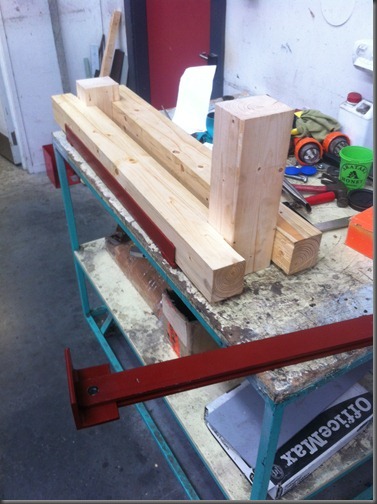
The drain bearers - the fit is good enough that with the steel reinforcing in place, they stay on with friction alone:
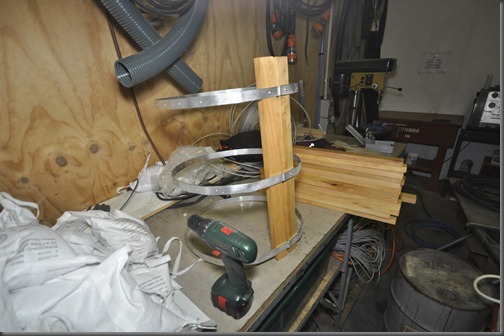
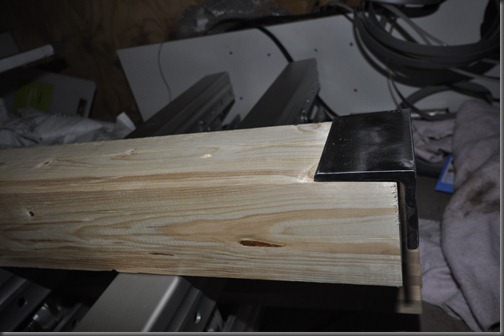
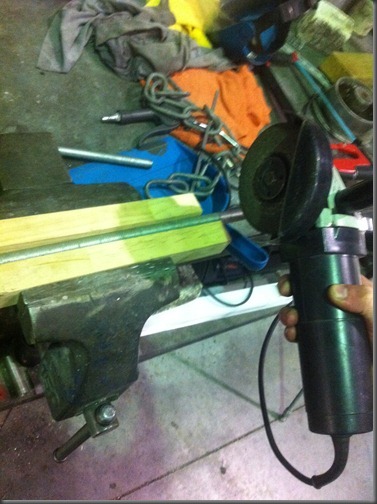
I cut up, cleaned, ARC welded (probably badly), and etch primed my steel reinforcing to take the load under the drain bearers (the cross members in the above image), and above and below the press bar (below basically just to stop the jack damaging the wood, top to take most of the stain). I used some offcuts of the angle iron as fixtures to attach the press bar to the uprights.
Sizing my DIY bracket fixture thingies:
Laying out the drain bearer steel prior to welding:
Vinyl etch priming the steel, post welding:
Checking all my sizing prior to drilling:
From the above image I’m sure you can guess how the drain bearers were supported, but the press bar assembly might be a bit cryptic so this should explain it.
Press bar assembly - when assembled, "up" is right in the photo:
There is steel flat bar both above and below the press bar, and angle iron masquerading as a fixture on top to screw through into the uprights. I used flat bar here because I want this to have a bit of movement in it, so that I can load up pressure on it and have to pump the jack less frequently.
I drilled the steel so I could run threaded steel rods between the press bar and the drain bearers – this is of course where most of the pressing force is loading, so it's nice to have all of this load going through metal rather than dodgy recycled wood.
Drilling the hole for the steel tension rods:
More mock up size checking
I hit a minor problem when I found that my threaded rods were not quite long enough, so rather than buy some more, I made up a couple of little connecters on the lathe:
All the best things in life are free, like threaded galv. rods in inconvenient 1m lengths.
I cut one rod to size the hard way:
After which I kicked myself, and cut the second one the easy way:
In order to get the whole thing just a bit more attractive (gotta give credit to Brewsci and Haish for talking me into this), I rounded the edges of the wooden sections with a corner rounding router bit and a router table…
The router table was totally unnecessary, could have just used the router by hand and made less mess.
The frame wood all got oiled with a product called CD50…
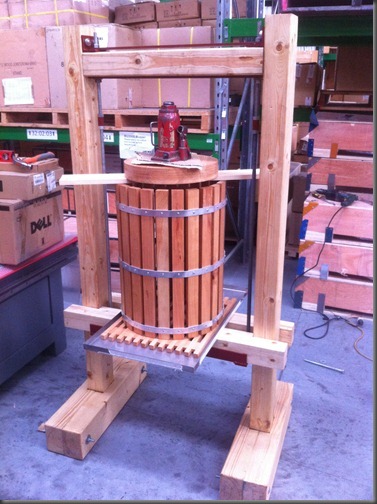
And I put the whole thing together:
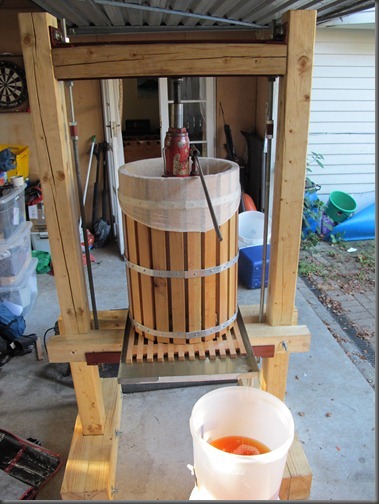
It lies flat in my car with the feet taken off, so I got it home and started using it. Note the use of a bit of plastic food wrap around the basket to prevent any squirts from making a mess. I wouldn't bother if I was outside, I just don't want ants and wild apple ferments where I brew...
It's super easy to use with that much grunt in the hydraulic jack:
It works great! We’re getting 70%+ extraction by weight on the thawed pulp. We could probably go higher but the apples are free and plentiful, so we aren’t using too much time going for the last 5% or whatever else we'd get out. The first 25l of juice literally falls out of the press without even engaging the jack.
I don't really have a fair measure of how long a press cycle takes, as I've been drinking and chatting etc every time we've used it so far, but it's probably about 20 minutes if you were paying attention, maybe a bit longer. One thing I can say for sure is that it takes a lot longer if you haven't used pectinase, and the extraction is much worse.
The first load of cider is going into a 220L ex-wine barrel to age til next summer (Brewsci, Haish and I are going thirds), and the remainder will be a few experiments with French style cider and berry ciders, A few gifted fermenter loads of juice to other folks and I guess the balance to be fermented on the pulp and pressed post-fermentation for calvados – and maybe a fruit based neutral for absinth! I also want to experiment with using the pressed pulp (“cheese” is the correct term I’m told) with dextrose added to see if I can’t make a grappa-like spirit out of apple waste. I've got a 50L carboy that is just begging to be used for "keeving" the french cider.
Cheers.
-
Comment by Liam Callaghan on March 9, 2012 at 11:06am
-
Mate, I am frothing at the bit to ave a pop at this! Made my first cider at home last year with the wifes juicer (Which smoked a little from the pressure). The kegs of it didn't last long though, one was finished in a single afternoon bbq with the neighbours.
Very impressive Richard, you must be stoked with that!
-
Comment by Richard Jack on March 9, 2012 at 11:12am
-
Yeah pretty happy with how it's worked out. I think it'll keep me in cider for quite some time. I like the idea of having a cider tap for non-beer people on the bar. Or at least a keg in there so I can disconnect a beer if the loss of a tap seems too much to bear.
-
Comment by Liam Callaghan on March 9, 2012 at 12:27pm
-
I just ordered my apples :p Too excited to get any work done now haha.
I think I'll get a single large fermentor made up for it though rather than doing lots of them, it will be an annual event so worth the expense and time - how much juice do you reckon you'd get from 400kg crate of apples?
Obviously it will depend on the apple but as a guide to the size of the fermentor required.
I flicked you a pm with my number, if your around on the weekend I'll pop over and pick up that yeast if thats ok - plus check out your press of course.
-
Comment by Richard Jack on March 9, 2012 at 12:45pm
-
200l minimum I'd think. A big blue poly drum is probably a nice solution for you. Or an old wine barrel!
-
Comment by Liam Callaghan on March 9, 2012 at 12:59pm
-
300 litre conical I reckon, simple dairy hopper will be sweet! Shared between three of us so not a lot of $$$. A dozen kegs of cider... Should keep us going until next year although there always seems to be a friend or relative getting married that ends up taking my stocks...
I'm very interested in how you get on with your other cider styles and the one in the wine barrel. Has the wine barrel got Brett in it?
I think I'll leave you to the grappa, horrible stuff!
-
Comment by Richard Jack on March 9, 2012 at 1:09pm
-
The inimitable Mr Brew_Sci is sourcing our wine barrel at the moment. I imagine it'll have all sorts of things growing in it, we'll likely clean it.
-
Comment by Liam Callaghan on March 9, 2012 at 1:29pm
-
It might add an extra dimension :p Brett can grow within the wood as it can digest wood sugars. I'll let you know how I get on with the plastic just in case. They might do deals on cider swap for tanks :p Beer is a good currency, I can't see cider being anything less!
-
Comment by Tilt on March 9, 2012 at 10:18pm
-
Word's getting round - check out post #58 on this AHB thread. AHB reference to your press and process. Great stuff.
-
Comment by Reviled on March 25, 2012 at 5:26pm
-
Holy shit this is legendary!! Good stuff bro
-
Comment by Stu H on March 29, 2012 at 10:07pm
-
dude, that is rediculous. Great work!
© 2025 Created by nzbrewer.
Powered by
![]()























You need to be a member of RealBeer.co.nz to add comments!
Join RealBeer.co.nz